
VST/AU
Action Pack for VST/AU
Nemisindo Action Pack brings six procedural sound instruments to your DAW: Fire, Gun, Explosion, Jet, Rocket, and Helicopter. Each generates sound in real time, with presets and controls for shaping it without stored samples.
Before you begin
Download your VST edition or AU edition and install the plug-ins. Use a format supported by your DAW, then scan its plug-in folders. The examples below use VST3 in REAPER and Ableton Live.
Load and audition
REAPER
- Open Preferences → Plug-ins → VST.
- Check the plug-in paths. If your installation folder is missing, add it using Edit path list → Add path.
- Click Re-scan, then close Preferences.
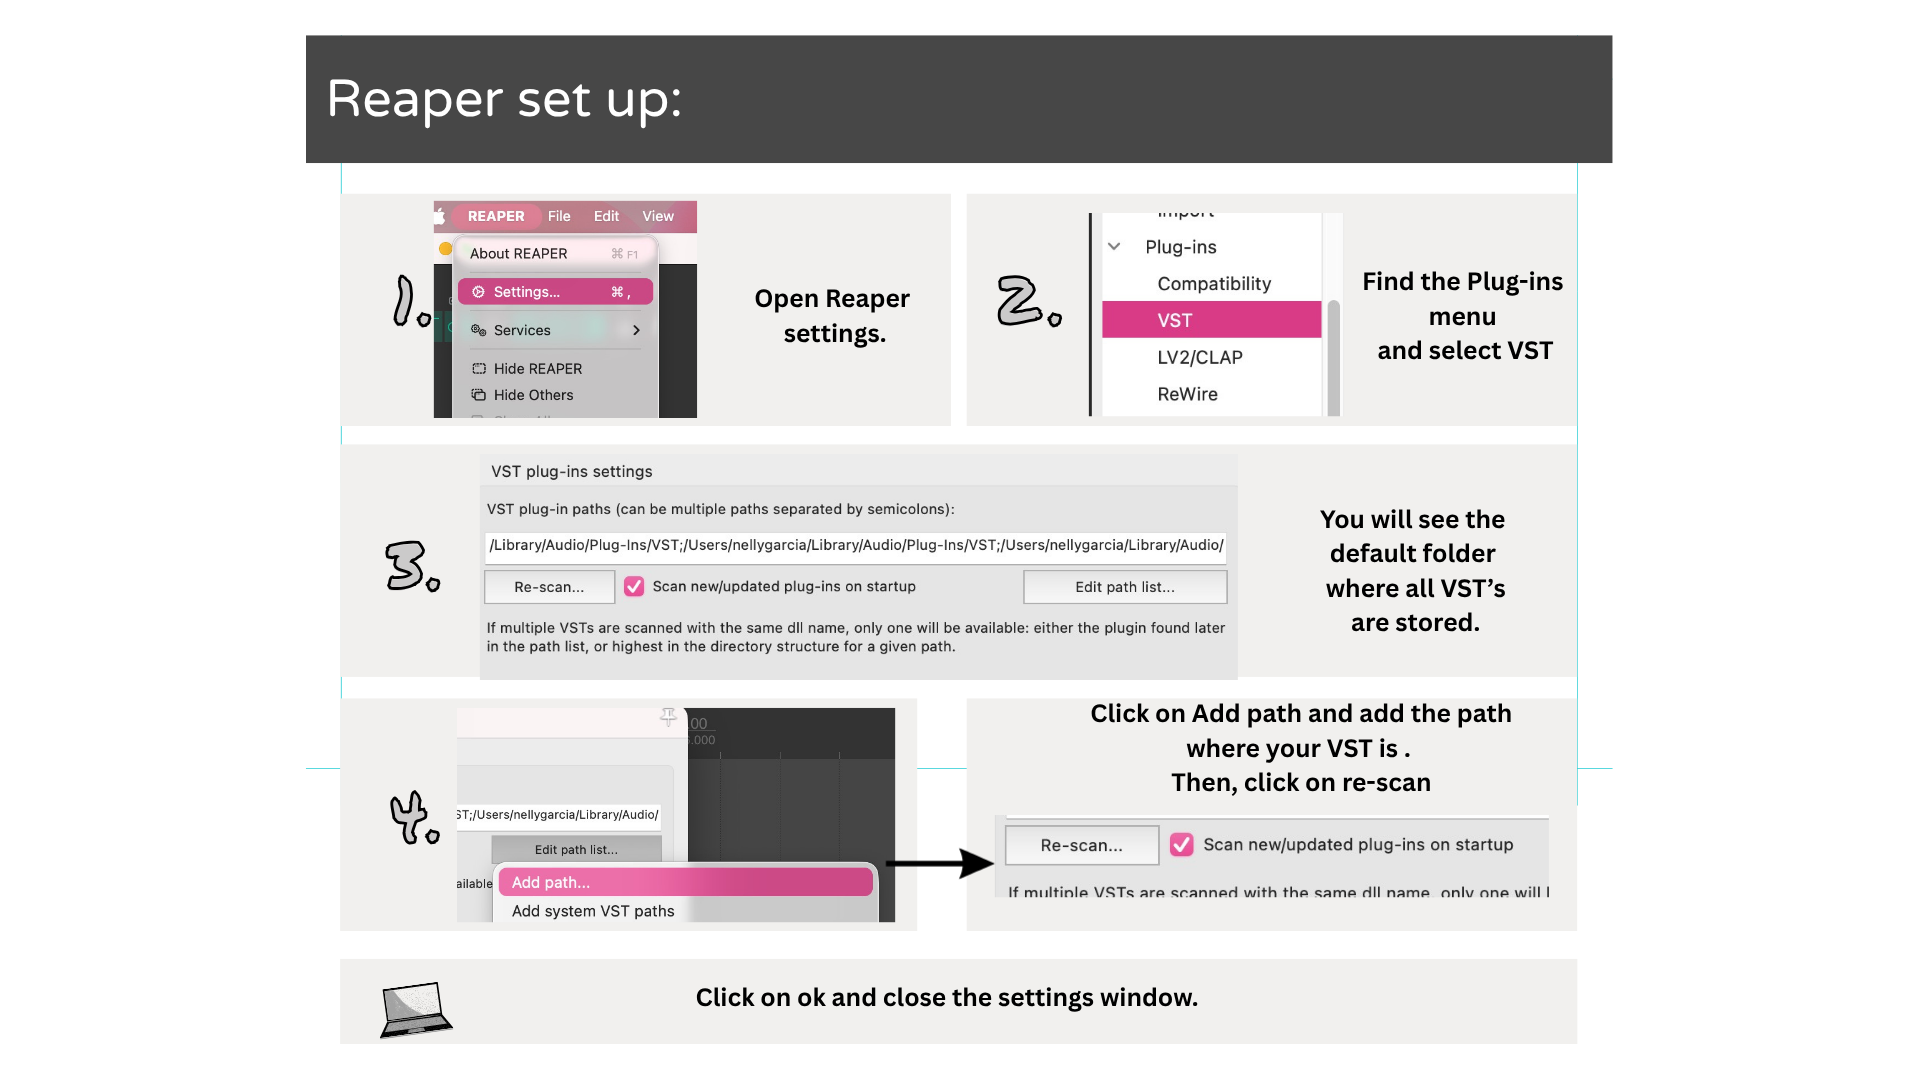
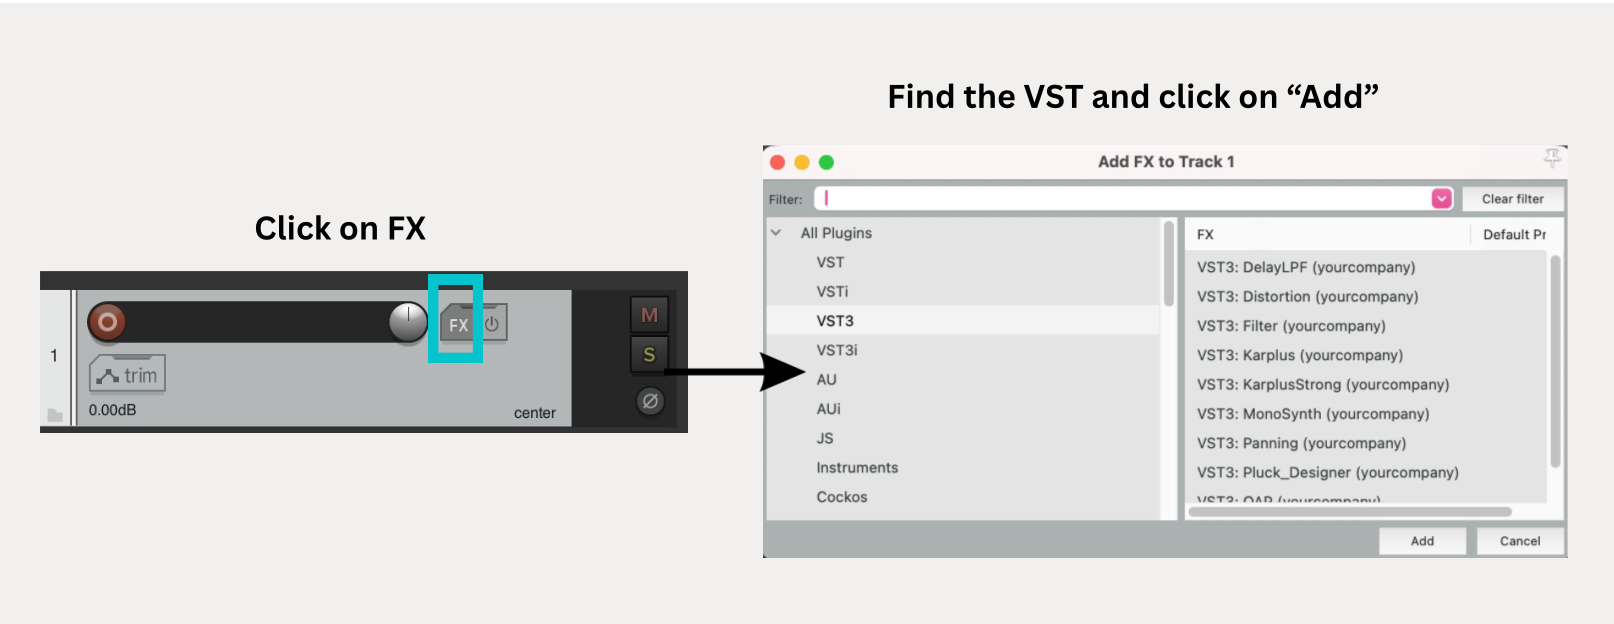
- Create a track and click its FX button.
- Find the desired Nemisindo instrument in Add FX and click Add.
- Open the plug-in and use its Start, Trigger, or Launch button to audition the sound.
Ableton Live
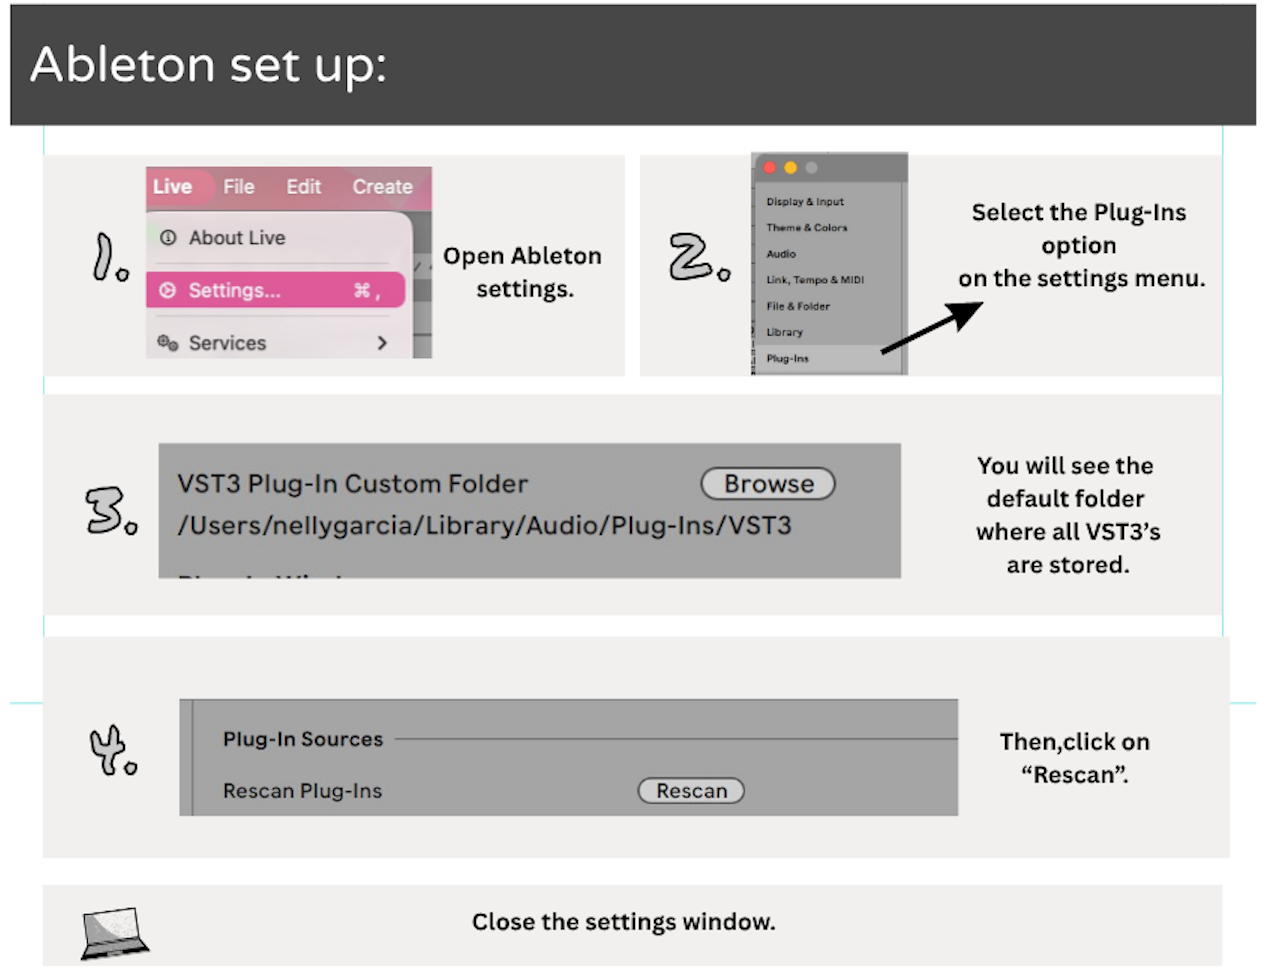
- Open Settings → Plug-ins.
- Enable the VST3 plug-in folder containing your installation. Use Browse to select a custom folder when needed.
- Click Rescan, then close Settings.
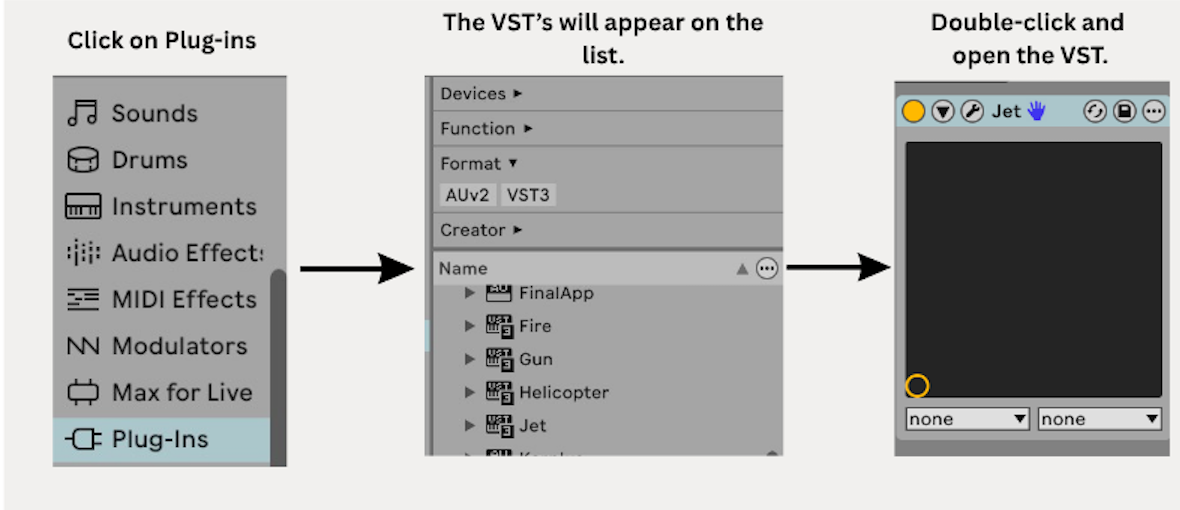
- Open Plug-ins in Live’s browser and find the Nemisindo instruments under VST3.
- Double-click an instrument to load it on a MIDI track, or drag it onto the track.
- Open its interface and use the playback button to audition it.
Presets and controls
Each plug-in has a header, a playback button, a Select Preset menu, and controls specific to its sound model.
- Nemisindo logo: opens the Nemisindo website.
- Question mark: opens the Action Pack documentation.
- Playback button: starts a continuous model or triggers a one-shot sound. Fire, Jet, and Helicopter run continuously; Explosion, Rocket, and Gun produce individual events.
- Select Preset: loads a starting sound. Adjust the controls afterwards to make it your own.
- Model controls: change the sound’s layers, tone, timing, and intensity. Change one at a time to hear its effect.

Sound model reference
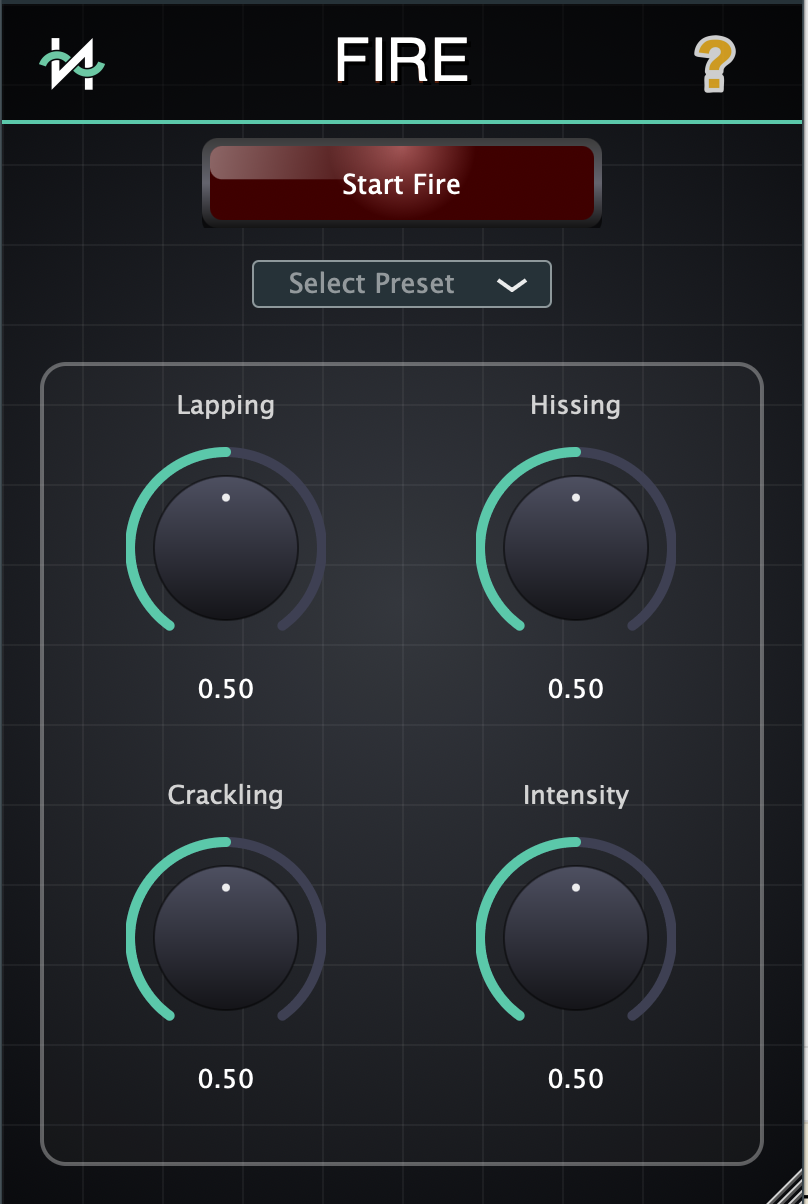
Fire
Balance the layers of a fire, from a small flame to a roaring blaze.
- Lapping: level of the flame-lapping sound.
- Hissing: level of the hiss.
- Crackling: level of the crackles and pops.
- Intensity: overall fire strength.
Presets: Burning Embers, Roaring Flames, Ambient Fire, Fire Lapping, Candle, Big Fire, Napalm, Camp Fire, Fire Hiss, Crackle and Pop, and Bunsen Burner.
Explosion
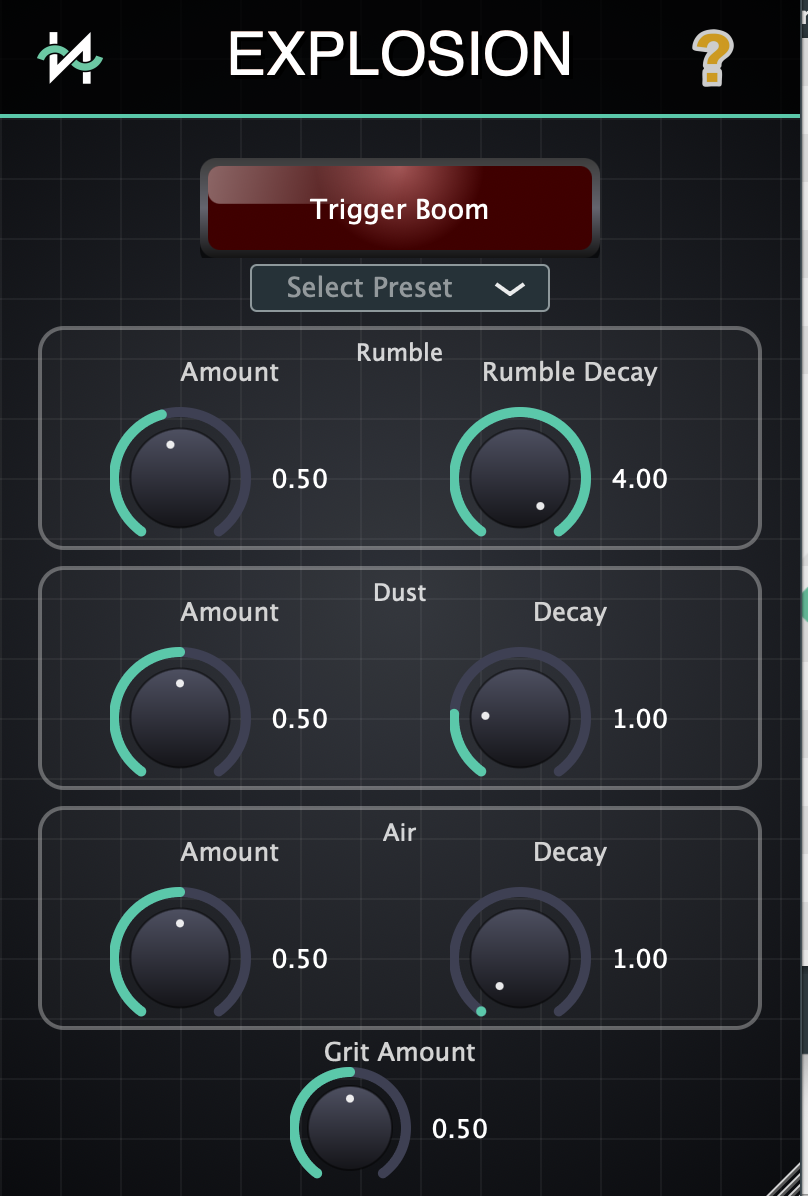
Shape a blast with separate rumble, dust, and air layers, then add grit.
- Rumble Amount: level of the low-frequency rumble.
- Dust Amount: level of the debris texture.
- Air Amount: level of the airy blast.
- Rumble Decay, Dust Decay, and Air Decay: shape how each layer fades.
- Grit Amount: adds a rougher, distorted character.
Presets: Big Blast, Massive Boom, Dusty Explosion, Bomb, Firework, Distant Explosion, Grenade, Thud Slam, Sci-fi Blast, Big Water Splash, Medium Detonation, Thud, and Explosion.
Rocket
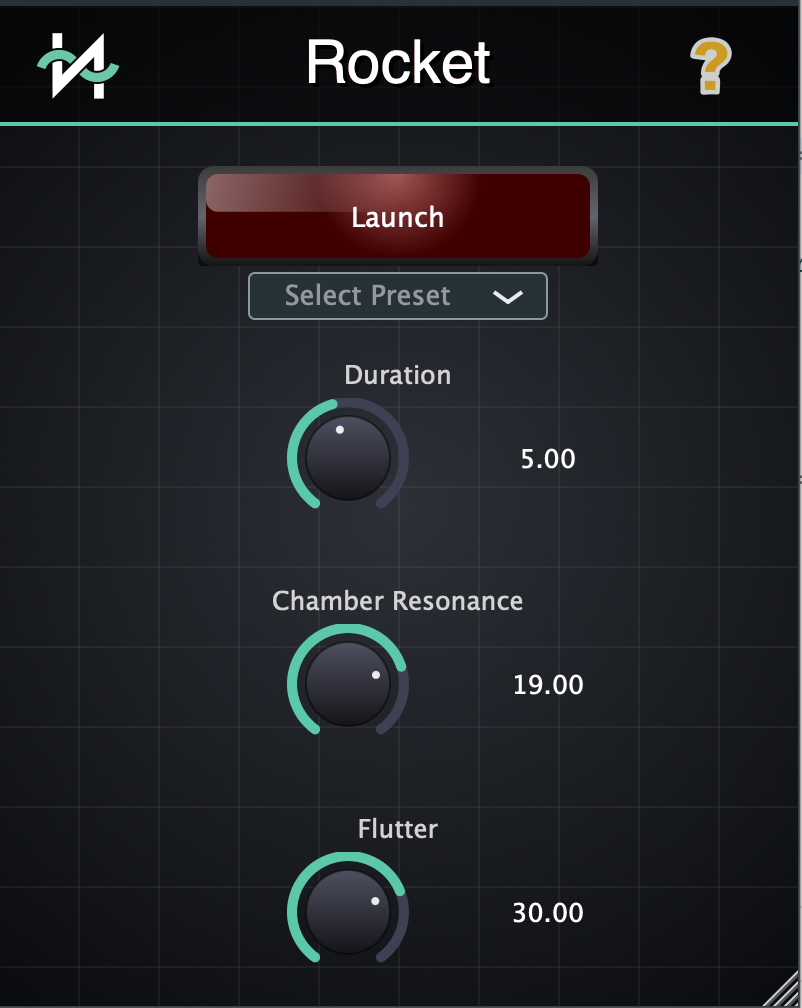
Create a rocket launch with three controls.
- Duration: length of the flight sound.
- Chamber Resonance: resonant character of the combustion chamber.
- Flutter: intensity of the rapid fluctuations in the exhaust sound.
Presets: Rocket Launcher, Quick Launch, and Distant Launch.
Jet
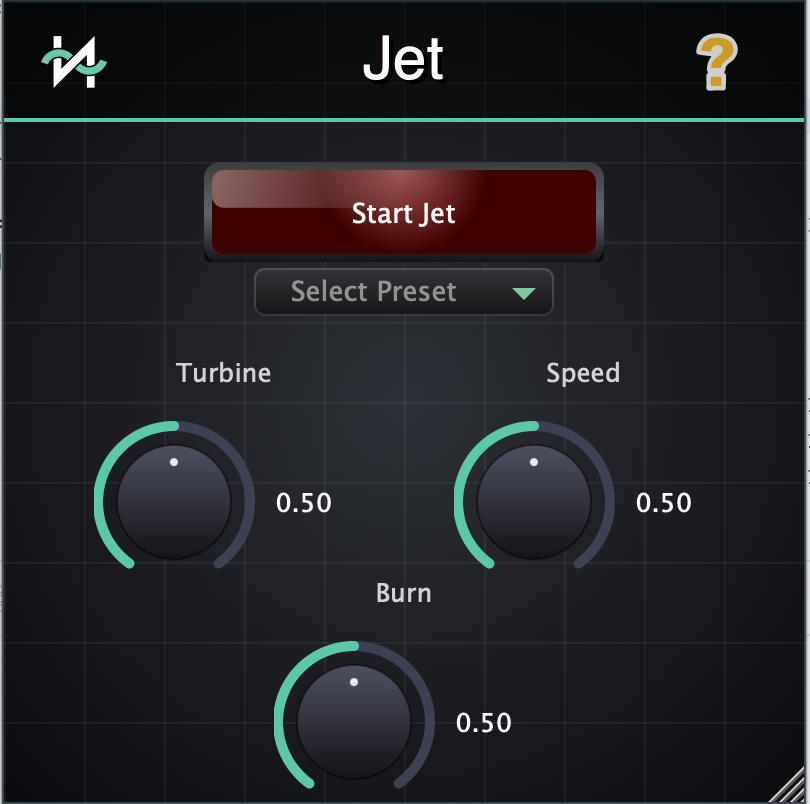
Combine turbine whine with the roar of the engine.
- Turbine: level of the mechanical whine.
- Speed: turbine speed.
- Burn: level of the engine roar.
Presets: Slow Acceleration, Low Thrust, Fast Acceleration, Airplane Interior Noise, Turbine Whine, High Speed, and Idle Jet.
Helicopter
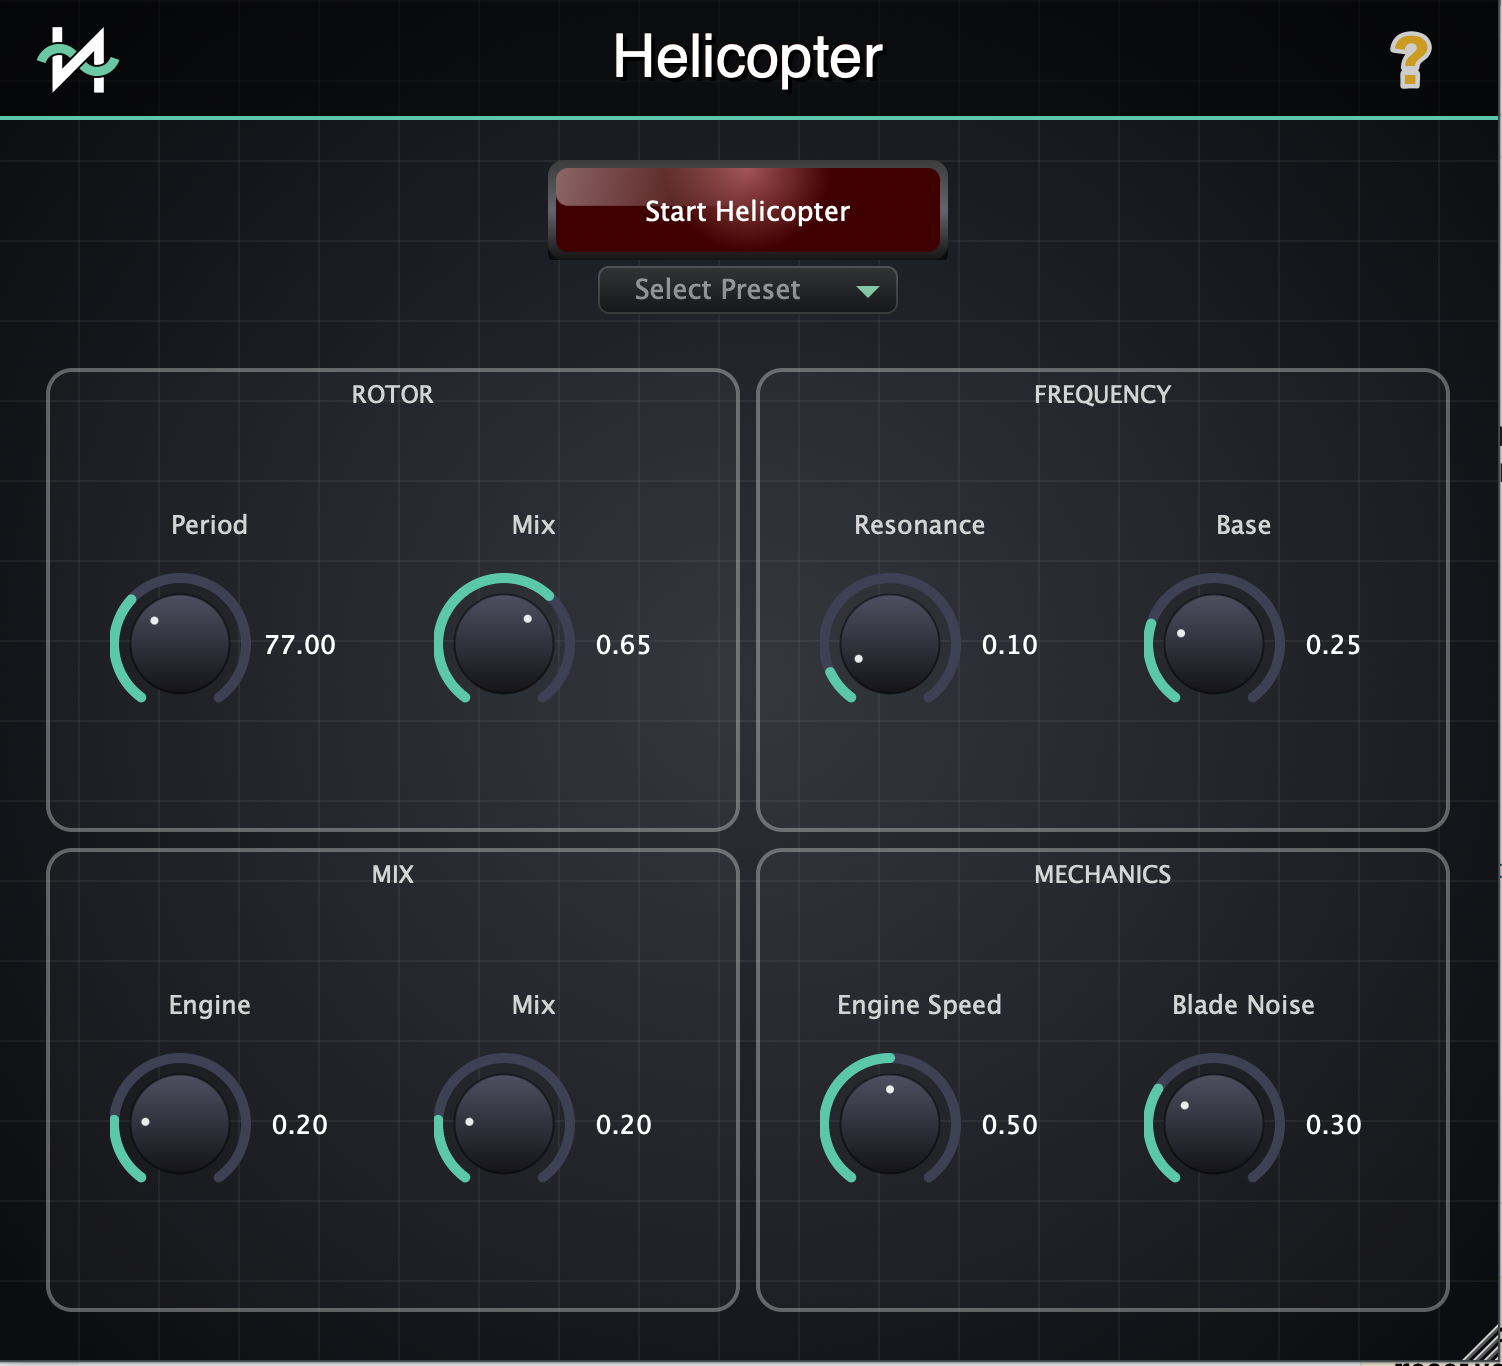
Eight controls shape the rotors, engine, and their balance.
- Rotor — Period: timing between rotor repetitions. Mix: level of the rotor sound.
- Frequency — Resonance: resonant character. Base: base pitch of the rotor sound.
- Mechanics — Engine Speed: engine speed. Blade Noise: noise from the blades.
- Mix — Engine and Mix: balance the remaining sound layers.
Presets: Slow Helicopter, Helicopter Idle, Helicopter on the Ground, Fast Flying Helicopter, Live Camera Helicopter, Pilot Headset, Distant Helicopter, and Resonant.
Gun
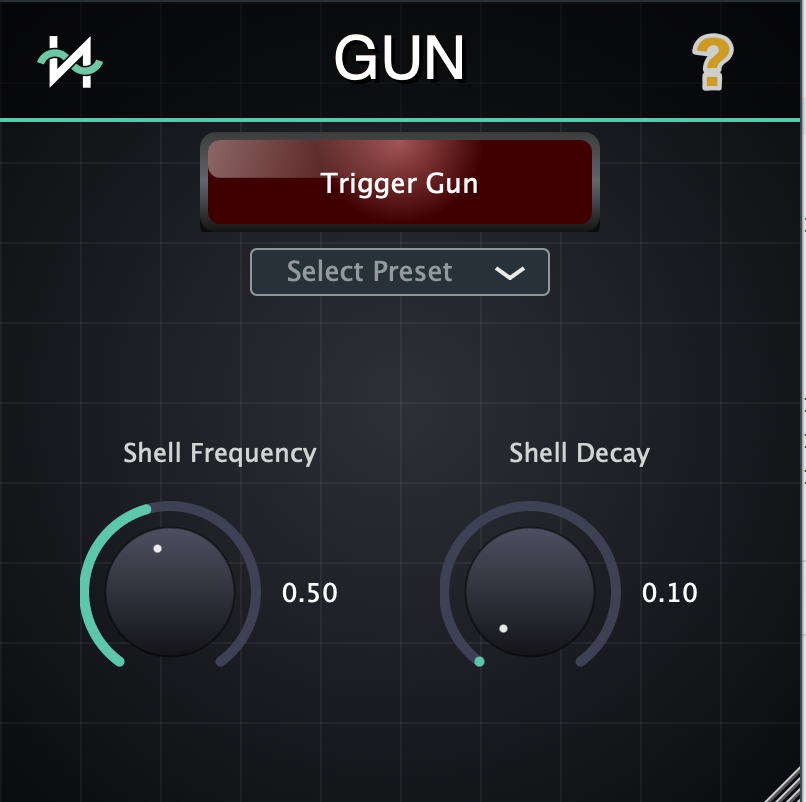
Shape the shell-noise component of a gunshot.
- Shell Frequency: pitch of the shell-noise component.
- Shell Decay: how long that component lasts before fading.
Presets: Rifle, Pistol, Uzi, Distant Rumble, Machine Gun, and Rusty Gun.
Put the sound in the mix
Route the instrument through your DAW’s mixer, balance its level, and add effects as needed. Use the DAW’s recording, bounce, or export workflow to capture the output, then listen back to check the start and full decay of the sound.
Troubleshooting
- The plug-in is missing: check that its installation folder is enabled in the DAW, then rescan.
- The plug-in is silent: use its playback button and check track levels, mute/solo, and output routing.
- A preset sounds different after editing: select it again to restore its starting settings.
- An export is silent or cut short: check the selected tracks, output routing, and export range, including the sound’s tail.
For middleware integration, see Action Pack in Wwise.